This image shows the AE workspace, including the time line, the frame and the design folders.
When creating a new AE document you need to select new composition.
When you have selected new composition a settings box will open which will allow you to set the correct digital format, the frame rate, the time line and the size. You can also change the colour of the background of your composition.
There are many different digital options when working on AE, its important to select the correct one, and this varies on what you are designing for and also the country it will be viewed in.
In the UK we use PAL, which stands for phase analogue line. PAL uses 25 FPS (frames per second)
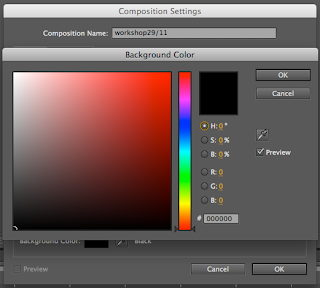
This is the colour setting box for your composition which allows you to change the background colour.
Once you have clicked okay to creating a new composition, it will appear in the top left box in the AE working space, it will show you the name, the file type and the frame rate.
If you ever need to go back and change any of the settings of your composition you can do so by following the links above.
Much like Illustrator and Photoshop, you can create new layers to work on within your composition, this will be useful when adding effects, shapes and text.
The above box shows you how to create a new object as a layer, in this instance I have created a square.
This shows how the square is placed within the frame, within the AE working space.
The new layer then appears with the composition.
The above image shows the time line. The vertical red line is what runs through the sequence when playing and it also allows you to move to certain points in the sequence.
This image shows how the shape layers are set on the sequence. This tool box allows you to change visual elements of the shapes.
This image shows the layers space and the tools which can be used to manipulate the layers. Such as the positioning, scale, opacity etc.
After adding a few layers I started to play with the positioning of the shapes and how they would move within the sequence. The way in which you would move something within AE would be related to the key frames tool.
The small yellow diamond shapes show key frames, these frames are here key changes happen within the sequence.
The red line shows the direction to which this shape will move when it passes a key frame on the timeline.
When it comes to saving your piece of motion you need to render it first. This prepares it for viewing.
 |
This shows the format that the file must be saved as.


No comments:
Post a Comment